You should choose a professional pool builder that is experienced in your local area as they will be well versed in potential hurdles relevant to your specific region, such as common soil issues, sloping block solutions and specialised permits.
Here at Rippleside pools we are SPASA members, this ensures we follow strict regulation to ensure the safety of your pool build and finished product.
Another deciding factor in how long it may take to build your fibreglass pool is when you enquire about your new pool. During the warmer months many pool builders are very busy delivering as many pools as possible for summer, and spaces do fill up quickly.
Keep in mind that summer is not only busy for the pool builders, but also for landscapers, so it is best to get in as early as possible for a smooth delivery. This is not to say that a pool cannot be installed in summer, but you may find there is less chance of flexibility around dates of installation.
Installation
Installing an inground fiberglass swimming pool involves a comprehensive process that requires careful planning, precise execution, and adherence to safety standards. Here’s a breakdown of the key steps involved in installing an inground fiberglass pool and an overview of the time frame for completion.
1. Site Preparation: The first step in installing an inground fiberglass pool is preparing the site. This involves excavating the area where the pool will be placed, ensuring it is level and free from any obstructions such as rocks, tree roots, or underground utilities. The size and shape of the excavation will correspond to the dimensions of the chosen fiberglass pool model.
2. Delivery and Placement of the Pool: Once the site is prepared, the fiberglass pool shell is delivered to the location. Carefully manoeuvring the shell into place requires specialized equipment such as cranes or forklifts. The pool is then lowered into the excavated area and positioned according to the manufacturer’s specifications.
3. Backfilling and Compacting: With the pool in place, the surrounding area is backfilled with gravel or sand to provide support and stability to the pool shell. Proper compaction is essential to prevent settling or shifting over time, which could compromise the integrity of the pool structure.
4. Installation of Plumbing and Electrical Components: Next, the plumbing and electrical components of the pool system are installed. This includes connecting the filtration system, pumps, heaters, and any other accessories such as lighting or water features. Careful attention is paid to ensure all connections are watertight and in compliance with local building codes. The electrical process must be completed by a qualified and licensed electrician, and this will be at the cost of the homeowner.
5. Finishing Touches: Once the pool shell is secure and the necessary plumbing and electrical work are completed, the finishing touches are added. This may include installing coping around the perimeter of the pool, decking or paving around the pool area, and any additional landscaping or hardscaping features.
Time Frame: The time it takes to install an inground fiberglass pool can vary depending on several factors, including the size and complexity of the project, site conditions, and weather. On average, the installation process typically takes between two to four weeks from start to finish. However, larger or more intricate projects may take longer to complete. It’s important for homeowners to work closely with their pool installer to establish a realistic timeline and ensure the project stays on track.
In conclusion, installing an inground fiberglass swimming pool is a multi-step process that requires careful planning, skilled labour, and attention to detail. While the timeline for completion can vary, the end result is a beautiful and functional addition to any backyard that provides years of enjoyment for homeowners and their families.
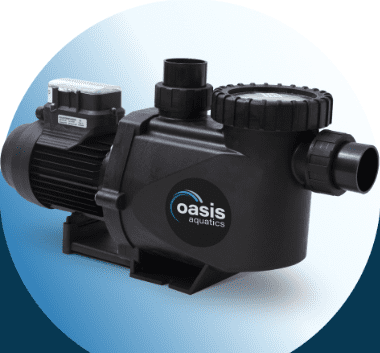
A pump is required on all swimming pools, it provides pressure to pump water through the pool equipment and sanitisation system. Here at Rippleside pools we always install the highest quality, Australian made products, and when referring to pumps the best option is a variable speed pump. Find our more HERE Filter Pump – Sunlover Heating – Solar Pool Heating
Variable speed pump:
- Energy saving and reduced electricity costs by up to 70% p/a compared to a single speed pump.
- Reduced noise, the advanced power of the pump allows for more effective flow and less noise.
- Highly adjustable flow rates
- Ideal for high flow applications such as spa jets and where in-floor cleaners are used
Single speed pump:
- Cheaper upfront costs
- Reliability (dependant on the sized of your pool)

Disclaimer: Each pool installation is different, and pool, filtration, heating, and chlorination systems can vary, so please make sure to check with your pool specialist before following any of the above information. Always check your manufacturer’s manual for the most up to date warranty and maintenance information.
Every swimming pool will have a filtration system that includes your filter, skimmer box and pool pump and the filtration system is necessary to keep your pool water circulating. Constant circulating water is vital for the health of your pool. There are two main types of filters – cartridge filter and media filters (sand or glass).
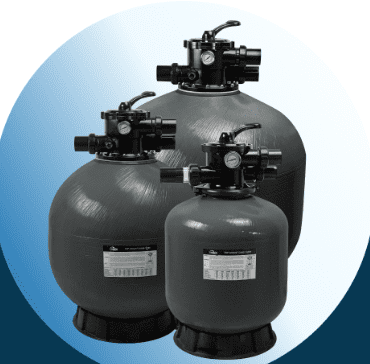
Media Filter (Glass or Sand)
All media filters will require regular backwashing, cloudy water is a good sign its long overdue. Backwashing clears the media from dirt and grime. If you are manually vacuuming your pool then you should immediately backwash your media filter after vacuuming. We recommend weekly backwashing of your media filter. Media Filters are easy to clean and heavy duty.
How to backwash your media filter:
- Turn off the pool pump
- Turn the valve handle to “BACKWASH”
- Start the pool pump
- Backwash until water in sight glass is clear (approximately 2-3 minutes)
- Turn off the pool pump again
- Turn the valve handle to “RINSE”
- Start the pool pump and operate for 30 seconds to one minute
- Stop pool pump
- Turn the valve handle to “FILTER”
- Start the pool pump to return to normal filtering
- Check the water chemistry levels. Sometimes extra water and/ or chemicals may need to be added to the pool to replace what has been lost
The sand or glass itself needs to be changed every 3-5 years depending on the circumstances.

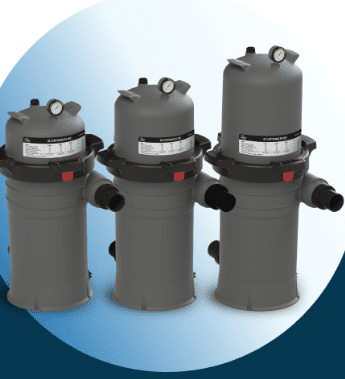
Cartridge Filter
The gauge on your filter should tell you when to clean the cartridge. We recommend cleaning your cartridge 3-4 times per year depending on the size of your pool.
How to clean your cartridge filter:
- Turn off the pool pump
- Check that you do not have an automatic timer on the pump that may interrupt your cleaning cycle
- Remove the cartridge from the filter via the easy grip handles
- Check the cartridge for any rips or tears and if so, contact your local pool shop or service person to see if you require a replacement
- Use a normal garden hose to wash away debris, by hosing top to bottom
- If your cartridge appears to have a lot of remaining debris or algae you can soak the cartridge for between 1-8 hours in a simple solution that you can purchase from your local pool shop or service person. This will then require rinsing again as outlined in step 5
- Once the cartridges are clean, return them to the filter and secure the lid firmly
Cartridges should last approximately 18 months to 3 years depending on the amount of usage and debris in the pool. At this point it is best to completely replace the cartridges to ensure the best health for both the filter and the pool.

Disclaimer: Each pool installation is different, and pool, filtration, heating, and chlorination systems can vary, so please make sure to check with your pool specialist before following any of the above information. Always check your manufacturer’s manual for the most up to date warranty and maintenance information.
In Victoria, Australia, installing an inground pool safety barrier is not just a matter of preference; it’s a legal requirement aimed at preventing accidents and ensuring the safety of children and pets. Here’s an explanation of what’s involved in complying with these regulations:
1. Legal Requirements: In Victoria, all swimming pools and spas, including inground pools, must have a compliant safety barrier installed. These regulations are outlined in the Building Regulations 2018 and the Australian Standard AS 1926.1-2012, which set out specific requirements for pool barriers to prevent unauthorized access, particularly by young children.
2. Type of Barrier: There are several types of barriers that can be used to enclose an inground pool, including fences, walls, and other physical barriers. These barriers must meet certain specifications regarding height, construction materials, and gate operation to ensure effectiveness in preventing access by children under the age of five.
3. Height and Construction: In Victoria, pool barriers must be at least 1.2 meters high measured from finished ground level. This height helps to prevent young children from climbing over the barrier. The barrier itself must be constructed in such a way that it is impossible for a child to crawl under or through any gaps or openings. Gaps can be no bigger than 100mm.
4. Gates and Latches: Any gates within the pool barrier must be self-closing and self-latching, meaning they automatically close and latch securely without the need for human intervention. The latch must be located at least 1.5 meters above ground level to prevent young children from reaching it. Additionally, gates must open outward away from the pool area to further reduce the risk of unauthorized access.
5. Non-Climbable Zone: A non-climbable zone must be maintained around the perimeter of the pool barrier, extending at least 900 millimetres from the barrier on the outside and 300 millimetres on the inside. This zone must be free from any objects, structures, or vegetation that could be used by a child to climb over the barrier.
6. Compliance Certification: Once the pool safety barrier is installed, it must be inspected and certified as compliant with the relevant regulations by a registered building surveyor or inspector. This certification is required before the pool can be filled with water and used.
7. Pool Registration: Any pool in Victoria must be registered with your local council. This is the responsibility of the pool owner and not the pool builder.
In summary, installing an inground pool safety barrier in Victoria, Australia, involves ensuring compliance with specific legal requirements regarding barrier type, height, construction, gate operation, and maintenance of a non-climbable zone. By adhering to these regulations, homeowners can help prevent accidents and create a safer environment for their families and visitors.
A weekly pool maintenance schedule is key to keeping your pool water safe and healthy and to avoid pool shell damage. Things to keep in mind:
- Maintain water levels
- Check pool equipment
- Empty skimmer basket and remove debris from pool surface with scooper
- Water chemistry check especially chlorine and pH levels (weekly with home tests strips and monthly at local pool shop)
To ensure the warranty of your pool, it’s recommended you take a sample of your pool water to be tested professional every month. You can also get small strip test kits so you can test you pool water at home each week. If you are adding pool chemicals to your pool, make sure to follow the instructions on the product or talk to our experienced staff at Rippleside pools for more information.
pH levels
pH tells us how acidic or basic the water is and these levels will determine if the water is safe or not to swim in. The pH of a swimming pool should be between 7.2 and 7.6. Other pool chemical can affect the pH levels.
Chlorine Levels
Chlorine keeps your water clean and safe for swimming. If Rippleside Pools installed your pool your salt chlorination levels should be kept at 2-3 parts per million (PPM) however, this can vary depending on the sanitation system you have installed on your pool. Too much chlorine in the water can damage pool equipment and shell so make sure to get this checked regularly.
Winter chlorine levels – if Rippleside pools have installed your pool you will have a salt mineral chlorinator therefore you need to lower your chlorinator to 1-2 PPM during the winter months.
Shocking
Shocking refers to adding chlorine chemicals to pool water to raise the ‘free chlorine’ level with the aim to destroy bacteria and algae and remove organic and inorganic waste (sunscreen, leaves, bird poo and bugs). Make sure to test the water at least 2-3 hours after shocking the pool to make sure chlorine and pH levels are safe for swimming in. If there has been heavy rain this reduces the chemicals in your pool so shocking the pool water is sometimes required after heavy rainfall.
Guide to maintaining ideal levels of pool chemicals:
Test weekly:
- pH: 7.4 – 7.6
pH is the level of acidity of the water. Incorrect levels can cause skin or eye irritation, and for other chemicals to be less effective, allowing nasty bacteria to remain present - Chlorine: 1.0 – 3.0 ppm
Chlorine is used for sanitising the pool water and is essentially responsible for killing bacteria. The warmer the water, the more chlorine your pool will require - Total Alkalinity: 80 – 140 ppm
This is the level of alkalined substance in the water and is important for keeping the pH level in line - Cyanuric Acid: 25 – 50 ppm
This acts like a chlorine stabiliser to ensure you don’t end up with an unnecessarily high chlorine demand
Test monthly:
- Calcium Hardness: 200 – 400
This is the level of how much calcium is dissolved in your pool and can determine how “hard” or “soft” your pool water is - Total Dissolved Solids: 500 – 5000 ppm
This is just as the name suggests- a total of everything that has dissolved in your pool water, including minerals, pollen, algae, sunscreen etc
*PPM stands for parts per million
Disclaimer: Each pool installation is different, and pool, filtration, heating, and chlorination systems can vary, so please make sure to check with your pool specialist before following any of the above information.
When comparing quotes for a pool installation, it’s essential to recognise that each pool building company may differ significantly in what they include and exclude. Understanding these differences helps ensure there are no surprises during the project and allows you to choose a quote that best aligns with your needs and budget.
***Rippleside Pools offers full transparency in our quotes. Each site is different, and the type of access available and size of the installation site can add to the cost of a job. For the most accurate quote we recommend an obligation free site inspection with our pool builder. ***
PRICE INCLUSIONS
25-Year Pool Shell Structural Warranty
Saltwater Pool Kit:
- Pump: Oasis Variable Speed Energy Efficient Pump
- Filter: Oasis Sand or Cartridge Filter (sized to fit pool)
- Sanitiser: Oasis Salt and Mineral Water Chlorinator
- Skimmer Box: Waterco Supa Skimmer Box
- Suction: Compact Pool Suction
- Lights: LED Pool Light with Transformer / PAL 2000 Colour Touch Light
- 4-6 Meter Pools: 1 Light
- 7-9 Meter Pools: 2 Lights
- 10-12 Meter Pools: 3 Lights
Tools:
- Vacuum Hose
- Deluxe Broom
- 4-in-1 Pool Water Test Kit
- Deluxe Vacuum Head
- Deluxe Telescopic Handle
- Deluxe Leaf Skimmer
Other Essentials:
- Filter Glass: Varies with pool size
- Salt: Up to 10 bags (depending on pool size)
- Earth Minerals: 2 bags (Magnesium Potassium Salt)
INSTALLATION INCLUSIONS
- Delivery: Pool shell delivered to site (crane cost extra, if required))
- Excavation: Site excavation included (non-soil material not included)
- Install:
- Base prepared for shell
- Stabilized backfill
- Plumbing for shell and pump
- Bond Beam: 470 x 150mm Concrete
- Fencing: Temporary pool fencing for 60 days for customers having safety barrier installed by Rippleside Pools.
- Insurance: Builder’s Insurance
- Permits:
- Builder’s Permit (additional costs for Build Over Easement / Planning permits or additional council fees)
- Council Asset Protection
- Pool & Safety Barrier Inspections
- Handover: Full demonstration
Optional Extras & Upgrades (Discussed & Agreed Upon with Client):
- Custom-made Pool Coping
- Pool Compliant Fencing
- Oasis Heat Pump (sized to fit pool)
- Pool Blanket with Roller or Inground Pool Blanket
- Robotic Wall & Floor Cleaner or In-floor Cleaning Upgrade
- Laminar Jets
- Swim Jets
- Wet Deck
